Saturday, October 18, 2008

Press for our upcoming opus. . .


This actually even looks like us!!

We got a lovely little article about our upcoming book, Fresh Eggs Don't Float in today's Daily Mail!

CHECK IT OUT!

You can pre-order a copy here.

Wednesday, September 03, 2008

Baba Ganoush


2 large aubergines, halved lengthways
2-3 tbsp olive oil
2 garlic cloves, crushed
4tbsp tahini
25g ground almonds
Juice of ½ lemon
1tsp ground cumin
Sea salt and freshly ground black pepper
Large handful of fresh mint leaves, roughly chopped

Preheat to 200c/400f
Brush the cut sides of the aubergines with some of the oil and bake them for about 35 min or until soft. Meanwhile, heat the grill to it’s highest setting.
Place the aubergines under the grill, cut sides up, and leave until they are black and blistered. This will take about 5 min. Remove and set aside to cool.
Scoop out the flesh, discard the skins, and place the flesh in a food processor. Add the garlic, tahini, almonds, lemon juice, cumin, and season with salt and pepper. Process to a smooth paste and check the seasoning.
Spoon into a serving dish, drizzle with the remaining oil and scatter over the mint leaves.

Can be made up to two days in advance and refrigerated.

From New Flavours of the Jewish Table.

What can I say about this except that it is Baba Ganoush. You have to have a recipe for it, because it is a staple (like Hummus). It’s great stuff, and this is a great recipe for it.

The aubergines need to be cooked, but that’s not hard to do, and other then that the food processor does the work for you.

Funny enough, it was my four year old that went totally over the moon for this one (though we all loved it). The first time I made it he kept pulling the bowl across the table and saying that the baba ganoush was his dinner, and we could all have the rest of the stuff. That is incredibly high praise from a four year old.

Sunday, August 31, 2008

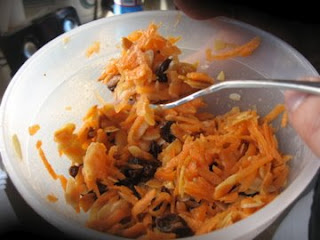
Moroccan Carrot Salad


This picture is awful, but this salad is so good! So Good!

75g flaked almonds
450g carrots
2 tsp clear honey
3tbsp olive oil
juice of ½ lemon
1tbsp rose water
50g raisins
1tsp ground cinnamon
salt and freshly ground black pepper

preheat to 200c/400f
place almonds on a baking sheet, and toast in the oven for 10 min, or until golden, set aside.

Grate the carrots in a food processor, or by hand, and place in a large mixing bowl. Stir in the honey, oil, lemon juice, rose water, raisins, and cinnamon. Season well with salt and pepper and mix well. Leave at room temperature for 1 hour for the flavours to infuse.
Stir in the toasted almonds just before serving.

I only recently discovered this recipe from New Flavours of the Jewish Table, but I’ve already made it three or four times (you’d think I could have gotten a better picture one of those times, but I’m always so excited to eat it that I forget).
I find it perfect because I always have carrots in the house, and I have a bottle of rosewater that I don’t use often enough, so it’s convenient in that respect. It’s also great because the prep is super quick, and although it has to sit for an hour (which could be a pain), it can also sit in the fridge for the day, or even overnight, making it the perfect make-in-advance accompaniment to whatever else you are having.

I have made this with the almonds toasted, with them un-toasted, with them added before serving, and with them added during the prep, and left in there while it infuses. The way it is done in the recipe gives the best results with the almonds giving it that subtle, almost but not quite - smoky flavour, but if you forget to toast them, or forget to hold them out, it’s no big deal, the salad will still be fabulous.

Easy, fast, delicious, exotic, and mostly made from ingredients that you could easily have to hand. This dish ROCKS!

Thursday, August 28, 2008

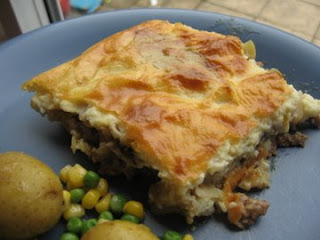
Babotie


2 slices white bread, crusts removed
600ml milk
1tbsp olive oil
1 large onion, chopped
450g lean minced beef or lamb
1 apple, peeled, cored and chopped
1-2 tbsp mild curry powder
50g flaked almonds
50g sultanas
zest of 1 unwaxed lemon
150ml beef stock
2tbsp apricot jam or mango chutney
salt and freshly ground black pepper

Topping:
40g butter
40g plain flower
1-2 bay leaves
2 large free range eggs, beaten
Good pinch of freshly grated nutmeg

Soak the bread in half the milk for about 10 min, then squeeze out by hand, and keep both bread, and remaining milk to one side.
Heat the oil in a large frying pan over a medium heat, add the onion and cook for 2 min. Add the mince and fry for a few minutes, until nicely brown. Add the apple, curry powder, almonds and sultanas, mix well and continue to cook for another 5 min.
Preheat to 180c/350f
Stir the lemon zest and stock into the mince, then crumble and mix in the squeezed-out bread. Season and transfer to a pie dish, leveling the mixture with a spatula. Warm the jam or chutney in the microwave for 20 seconds to make it runnier, then brush it over the top of the pie to seal it, and bake in the oven for 10 min.
Now make the topping. Melt the butter in a saucepan over medium heat, add the flour and beat for a minute or so until you have a light sandy texture. Gradually add the reserved milk, and the bay leaves, beating all the time so the mixture remains smooth. (if it does go lumpy, use a wire.) Take off the heat, beat in the eggs and nutmeg, and season.
Remove the mince from the oven, pour the topping evenly over the top, then bake for a further 35-40 minutes, until nicely browned.

I know I have made Babotie before, but I recently tried this recipe from Ainsley Harriott's Feel-Good Cookbook , and I think I like it better.

The original one that I made had a super easy meatloaf-like preparation, whereas in this one you have to cook the filling separately, then bake it, then add the topping and bake again. It seems like that would be a lot more work, but it was not a big deal in the end. It was worth it too, because it gave it a much nicer consistency. It was less meat loaf-y and more cottage pie-ish.

The flavour was lovely, and the topping was too. The whole family approved of this new version.

Sunday, August 24, 2008

Herring salad in soured cream sauce


1x300g jar of pickled herrings
1 shallot or small onion, finely chopped
1 red apple, cored and coarsely chopped
2 dill pickles, rinsed and roughly chopped
150ml soured cream
1 tsp sugar or to taste
sprigs of fresh dill or fresh parsley, to garnish
pumpernickel or rye bread to serve

Drain and rinse the herrings, scrape off any skin or membrane, and cut into small pieces
In a medium bowl, combine the herrings, shallot or onion, apple, dill pickles, soured cream and sugar.
Cover and refrigerate for at least 24 hours
Garnish with dill or parsley and serve with pumpernickel or rye bread

From New Flavours of the Jewish Table.

I was really excited when I found this recipe. Back in the States it’s really easy to find jars of this herring salad at most supermarkets. My grandfather used to eat it all the time. Whenever I saw it in the store I would think of him, and although I didn’t buy it regularly, I liked to have some once in a while.

I’ve not ever seen it out here (except there is a version of it at IKEA), so it had been a really long time since I had come across it. This recipe for it was wonderful. It was easy to make, and it was delicious. My husband was pretty unsure about it, but agreed to try it. Although he found the mixture of fish, apples and pickles a little hard to get his head around, he actually liked it quite a bit, and had more then one serving.

I love this dish, and I love this recipe for it. It’s still not something I would keep in the house regularly, but when I do have the urge, I know how to make it myself now.

Saturday, August 23, 2008

Vietnamese style crispy pork and little gem salad


1tbsp sunflower oil
450g pork mince
2tsp freshly grated ginger
1 red chili, seeded and finely chopped
1 garlic clove, crushed
4 spring onions, trimmed
2tbsp chopped fresh coriander
2 tbsp chopped fresh mint
2tsp soy sauce
2tbsp fish sauce
2tbsp rice vinegar, or white wine vinegar
1tsp soft light brown sugar
3 limes
50g dry roasted peanuts, chopped
4 little gem lettuces
Fresh coriander sprigs, to serve

Heat half the oil in a large frying pan over high heat. Add half the pork and cook, stirring occasionally, until browned and crispy. Remove from the pan and put into a bowl or dish, then cook the remaining mince in the same way.
In another bowl, mix together the ginger, chili, and garlic. Finely slice the spring onions, and add to the bowl with the herbs. Add the soy sauce, fish sauce, vinegar, sugar and the juice of 1 lime. Give it a good mix, then pour the mixture over the crispy pork. Scatter the peanuts over the mince.
Cut the remaining limes into wedges, and separate the leaves of the lettuces.
Scoop some crispy mince onto each lettuce leaf, add a squeeze of lime and top with a sprig of coriander.


This type of salad became really popular a while ago. All of a sudden I was seeing them everywhere. They looked good, but I tended to avoid them, as I’ve never been a terribly fashionable person. Still, they looked so good that eventually I was worn down.

I decided to try this one from Ainsley Harriott's Feel-Good Cookbook , as his happened to be the one I was looking at when I made up my mind to take the plunge.

I’m really glad I did it. This was delicious! It was beautiful to look at, it was fast to make, and it was so tasty that I wanted to make it and eat again right away. The filling of the individual leaves was a bit fiddly, and I would think that if you were serving it casually, to the family, you could probably serve it in a bowl with the leaves on the side and let people do that part themselves. Either way, it will be a crowd pleaser.

Thursday, August 21, 2008

Bread and Tomato Soup


Everyone who is growing tomato plants needs to have this recipe!


from Jamie’s Italy
500g/1lb2oz ripe cherry tomatoes
3 cloves of garlic, peeled and finely sliced
a large bunch of fresh basil, leaves picked, stems chopped
olive oil
sea salt and fresh ground pepper
2x400g good quality tins of tomatoes
500g/1lb2oz good quality bread, stale

Prick the cherry tomatoes, and toss with one sliced clove of garlic, and a quarter of the basil leaves. Drizzle with oil and sprinkle with salt and pepper, put in a roasting tray and bake at 180c/350f for 20 min.
In a large pot, heat the oil and add the remaining garlic, and the basil stalks. Stir for a minute till soft, add the tinned tomatoes, fill the tins with water and add that, break up the tomatoes with a spoon. Bring to a boil and simmer for 15 min.
Tear the bread into thumb sized pieces, and add to the pot. Mix and season. Tear in the basil and sit over low heat for 10 min. Pour in the cherry tomatoes with all their liquid, and give it a good stir.

This is another recipe that I used to make all the time before the year long cooking challenge started. When I started making a new recipe every day, this one got left behind, so I thought I would revisit it, and see if it lived up to the memory after all the recipes that I have tried and all of the things that I have learned.

It did!

If you are growing your own tomatoes, then this has got to be the cheapest soup in the world to make, as all you’ll really need is some fresh basil, and some stale bread.

The texture of it is sort of thick and sticky like porridge, but also very silky and smooth at the same time. You could probably eat it with a fork it’s so thick, and the flavour is amazing. The fresh basil, and the fresh roasted tomatoes really make it taste summer-y, even though it is filling enough to be a winter dish (if you could get decent tomatoes in the winter).

The recipe is simple and fast too. One thing I noticed is that it may not need to go a full 10 minutes in that last step, you don’t want it to start burning on the bottom.
This one was as good if not better then I remembered. I am not going to lose sight of it again.

Tuesday, August 19, 2008

Chicken With Olives and Sage


I was thinking about how before I started the year long cooking challenge, I had a few favorite recipes that I made all the time. I wondered if I would still like them as much, now that I have so much more cooking experience. I looked through my old notes and picked a few to make and review this week.

The first was a super easy chicken recipe that was my husbands all time favorite. It’s Chicken with olives and sage from a book called Twelve. Nice book. It’s all Tuscan recipes laid out in the twelve months of the year so that you can cook with the things that are in season that month. Jamie Oliver did the same type of thing in his last book.

5tbsp olive oil
1 chicken (1.5kg) cut into 8 portions
200g black olives in olive oil (drained)
4 garlic cloves, peeled and lightly crushed with the flat of a knife blade
about 20 fresh sage leaves
125ml (1/2 cup) white wine


preheat to 200c (400f)
Heat the oil in a wide saucepan or casserole dish suitable for oven use.
Add the chicken and brown on all sides (should take 10-15 min). Season with salt and pepper on all sides. Add the olives, garlic cloves, and sage leaves and cook for a couple of minutes to blend the flavours.
Pour in the wine and transfer the dish to the hot oven. Cook for 30 – 40 min.

If you would like more sauce, remove the chicken, sage, olives and garlic to a plate, add 60ml (1/4 cup) water to the pan and put on the stovetop. Scrape up the bits with a wooden spoon mixing them into the sauce, let it bubble for half a min or so.

This recipe has to be one of the easiest in the whole world. It is simple in the best of ways it’s just a few ingredients that really compliment each other, so that with the smallest amount of effort, you have an amazing chicken dish. We liked it just as much as we used to.

I have a sage bush growing in the back yard, so fresh sage is not a problem, but when I used to make it (in our old flat), I used to use dried sage and it worked just as well. Back then I also didn’t have a pan that could go from the stove top to the oven, so I would brown the chicken in a pan, then just transfer it to a casserole before pouring over the wine. It added a touch of hassle, but worked just fine.

This recipe still rocks, I’m glad I found it again.

Thursday, August 07, 2008

Bambi Birthday Cake


So I made another funny cake. After seeing my son’s Car
cake, a friend of mine mentioned that her daughter would really like a birthday cake shaped like Bambi (the Disney deer). I thought about it for a really long time, and this is what I came up with.


She loved it! I loved making it too. I used two batches of Victoria sponge batter, only instead of making four circle shaped cakes, I made three in loaf tins and one in a regular Victoria sponge tin.
The body is made out of two of the loaf cakes, and the head is made out of half of the third one. The circle was perfect for making the legs, and the other bits (ears, tail) were made from scraps from the third loaf, and the circle.

I find that it’s best to make the cakes the day before, and refrigerate them over night. It makes them a little less delicate, easier to cut and manipulate.

These cakes are my new favorite hobby, so hopefully there will be more of them in the future.

Wednesday, July 02, 2008

Prawn and Ginger Noodle Salad


Fine rice noodles 250g pack
Large prawns 250g peeled and cooked
1 small mango peeled and sliced
Light soy sauce 4 tbsp
Root Ginger 2 inch piece, finely grated
1 lime, juiced
coriander leaves, a large bunch, roughly chopped

Soak the noodles in boiling water for 6-7 minutes, until tender. Rinse under cold running water then drain and put into a bowl with the prawns and mango.
Whisk the soy sauce with the ginger, lime juice, and some black pepper and pour over the noodles. Scatter the coriander over and toss together.


So over the weekend I found myself looking for something that could be made in no time at all, and mostly out of things that I already had in the house, as I was really short on both time and money.

I found this in 101 Quick Fix Dishes.

It was perfect. Shrimp (prawns) have been on sale recently, which led to the discovery that both of the boys totally love them. My little one refers to them as “those pink-y, white-y things” and asks for them every time we go shopping.

This was everything I was looking for. It was tasty, it was one of the fastest dishes I’ve ever put together, we had most of the stuff in the house already, and as a bonus, everybody loved it.

Good stuff.

Sunday, June 29, 2008

Broccoli pesto


2 heads of broccoli
50g pine nuts
1 clove garlic, chopped
a handful of fresh basil leaves
a handful of fresh coriander leaves
50g freshly grated parmesan cheese
4 tbp oil
a pinch of salt and freshly ground black pepper

Follow the packet instructions to cook the pasta of your choice
Remove the tough stalk from the broccoli and break the heads into florets. Place them in a pan of salted boiling water for about 3 minutes. Drain.
Put the broccoli in the bowl of a food processor, along with the pine nuts, garlic, basil, coriander and grated parmesan. Blend until smooth, drizzling in the olive oil, little by little. Season with a little salt and pepper if preferred.
Add the broccoli pesto to the cooked and drained pasta, while it is still hot from cooking. Stir until the pasta is well coated and serve.

There are so many great things about this recipe. It’s packed full of broccoli. It takes no time at all to make. It requires less oil then regular pesto. Best of all, it’s really tasty.

My food processor was too small to do it all in one batch, so I had to do it in two batches, then mix it together, but it still took less time then it took to make the pasta.

I used the same water for the broccoli as I did for the pasta, to save on water boiling time. I just scooped the veg out with a slotted spoon, and dumped the pasta into the slightly green water. It was fine.

I got this from Great Big Veg Challenge which started as a website Here.It’s designed to get fussy eaters to like broccoli, and I could see how it could work wonders.

This will be made again, as it got rave reviews from every family member.

Wednesday, June 25, 2008

Hameen


2 Tbsp veg oil
2 onions, roughly chopped
3 garlic cloves, finely chopped
3tsp turmeric
1inch piece of fresh root ginger, finely chopped
2.3kg (5lb) roasting chicken, cut into portions
400g basmati rice
450g salad tomatoes, roughly chopped
2tbsp tomato puree
7 cardamoms
3 cinnamon sticks
2 litres (3.5 pints) chicken stock
Salt and freshly ground black pepper

Preheat to 120, or the lowest setting.
Heat the oil in a very large frying pan, add the onions, garlic, turmeric and ginger, and saute over a medium heat for 2 min, until the onion and garlic start to color. Add the chicken pieces and sauté for 4-7 minutes until they are brown all over. Add the rice, tomatoes, tomato puree, cardamoms, and cinnamon. Cook for a further 2 minutes, then pour in the stock. Make sure the stock completely covers the rice. Season with salt and pepper.

Mix well so that the cinnamon flavours infuse into the chicken. Bring to the boil, then reduce the heat and simmer for 10 min. Transfer to a large oven proof dish, and cover with foil, and then the lid.
Place in the oven and cook overnight, or for a minimum of 3 hours.

This recipe is from the upcoming title New Flavours of the Jewish Table.

Right off the bat I would like to say that this was wonderful, and that you should only make half of the amount stated, maybe even less. I made a half recipe, and I had a hard time fitting it in my huge cast iron pot. I did not have any trouble eating it all, it was that tasty. The spices are all really warming flavours, and the texture is sort of heavy and sticky, but in a really good way.

The cooking method is brilliant. It cooks for 3 hours, to overnight, however long you want to leave it, and it doesn’t require any checking or prodding once you put it in the oven. I made it in the morning right after breakfast, and then we were able to go out for the day and do whatever we liked, knowing that there would be a great meal, whenever we felt like eating it. The leftovers on the following day were just as good too.

I loved this one!

Friday, June 13, 2008

Falafel


250g dried chickpeas
3-4tbsp bulghar wheat
1 large onion
5 garlic cloves
5tbsp finely chopped fresh parsley
5tbsp finely chopped fresh coriander leaves
3tbsp ground cumin
1tbsp ground coriander
2tsp baking powder
1tsp salt
pinch of cayenne
Freshly ground black pepper
1 egg
3-4 tbsp gram flour
vegetable oil for deep frying

Soak the chickpeas for at least 4 hours, or overnight. Drain and rinse.
Put the chickpeas in a medium size pan and cover with about 1 litre of water. Bring to a boil and then reduce the heat and simmer for 45 min, adding more water if required. Drain.
Grind the chickpeas in a food processor. Put the ground chickpeas into a bowl, and stir in the bulghar wheat.
Put the onion, garlic, parsley, fresh coriander, ground cumin, ground coriander, baking powder, salt and cayenne in the food processor and season with pepper. Process to form a spicy paste. Add this to the chick pea mixture in the bowl.
Add 100ml water and the egg to the bowl. Stir in the flour, adding a little more water if the mixture is too dry, or more flour if it is too wet. Using wet hands, shape the mixture into about 40 walnut sized patties.
Heat the oil in a deep fryer until it is hot enough to brown a cube of bread in 30 seconds. Add the falafel patties to the oil in batches and cook for 3-4 minutes until golden brown. Remove with a slotted spoon and drain on kitchen paper.

These were so good! They were right up there with the best falafel that I have had. The outside was perfectly crispy, and the insides were full of flavor. They had a beautiful texture, not just mushy in the middle, and they were not too dry. They were also pretty easy to make, as long as you are comfortable with deep frying.

I did like the recipe said and used dried chickpeas, which I soaked overnight and then boiled, but after I drained them I weighed them. The 250g of dried had become about 600g of prepared chickpeas. Next time I make this, I am going to see if I can get the same results with tinned ones. I think 2 tins would be just about right.

When it comes to the frying, do be careful because they can fall apart easily, both when you are putting them in, and when you are turning them over. You have to be pretty gentle. It’s also a good idea to do many small batches so you don’t overcrowd the pan. That’s true whenever you are deep frying, because it will cause the temperature of the oil to drop just enough to make the food taste overly greasy. It’s also important in this case because you have to be able to see each individual one so that you can turn them and remove them gently. My last batch got a bit lost in the fog of overcrowding and I wound up with a bunch of really tasty, but broken falafel-y chunks.

I served these with pitta bread, hummus, baba ganoush, olives and peppers. It was beautiful. I have been meaning to learn to make these for a while, and this recipe, from New Flavours of the Jewish Table.
did not disappoint. I will definitely make these again.

Tuesday, June 10, 2008

Turnip pickles


500g White-mauve turnips, unpeeled, both ends trimmed
20g beetroot, peeled and cut into 3 pieces
1-2 chilies (optional)
1 ½ tbsp sea salt
150ml organic cider vinegar
extra virgin olive oil, to cover the turnips (optional)

Make cuts along the length of turnips at 5mm (1/4 in) intervals bit leave them whole. Pack the turnips, beetroot and chilies if using into a sterilized glass jar. Bring 400ml water to the boil, add the salt and dissolve completely. Cool, stir in the vinegar, and pour over the vegetables in the jar to cover completely. If desired, add a thin film of olive oil to prevent them spoiling. Seal and keep in a dark kitchen cupboard. Eat after 10-14 days.
From New Flavours of the Lebanese Table .

I used to be able to get these when I lived in Brooklyn. They sold them in the Middle Eastern grocery shops out of huge plastic buckets. They would scoop them out by the spoonful into little plastic containers, much to my excitement, and my husband’s revulsion.

When I found a recipe to reproduce them, I was thrilled, and he promised to try them one more time.

I made one big mistake while I was preparing these. I cooled the liquid a bit too much, and used a hot freshly sterilized jar. The jar was still hot enough to crack instantly when it came in contact with the very cool liquid. Oops. More of a science issue then a recipe issue. For the next jar, I waited for the glass to cool down a bit, and it all went fine.

The turnips that I was able to get hold of were far too big to be pickled whole, they would not have fit in the jars, so I cut mine into large chunks, about the size of tiny little turnips.

The photo was taken the instant that I poured the liquid over the vegetables. It was really cool, the color immediately started to bleed from the beets, and within minutes it was purple all the way through.

Other then the broken glass (not the recipes fault), this worked beautifully. I love them, and will make them over and over again. My husband even warmed to them, a little.

I thought I would enter these into a blog challenge. It’s a celebration of Middle Eastern food, for more information on it check here:Announcement.
And also here: Dhivya's blog.

These are easy to make, they are traditional, they go with anything you are eating, and they are super tasty.

Thursday, June 05, 2008

North African Pitta Bread Salad


4 pitta breads
2tsp coriander seeds
1 tsp cumin seeds
3tbsp Extra virgin olive oil
3 large salad tomatoes, deseeded and roughly chopped
1 green pepper, deseeded and roughly chopped
1 red pepper, deseeded and roughly chopped
4tbsp roughly chopped fresh mint
4 spring onions, trimmed and chopped
1 garlic clove, crushed
1 cucumber, halved, deseeded and chopped
4tbsp olive oil
Juice of 1 lemon
Salt and freshly ground black pepper

Preheat to 200c
Cut the bread into 1 inch squares. Grind the coriander and cumin seeds with a pestle and mortar and mix with the three tbsp Extra Virgin Olive oil. Place the pitta squares on a baking sheet, drizzle with the spiced oil mixture and toast in the oven for 10 min, or until crisp and light brown. Set aside.

In a large bowl combine the tomatoes, peppers, mint, spring onions, garlic, and cucumber.

In a separate bowl mix the olive oil and lemon juice, and season with salt and pepper. Pour the dressing over the salad ingredients and stir in the toasted pitta squares.

Mix well and serve immediately.

Beautiful summer salad from the forthcoming title, New Flavours of the Jewish Table. This is great because it is tasty, the bread makes it more filling, and the chunkiness of it makes it a great salad for little kids too. Even my kids, who eat most things, will turn up their noses at salad, but they ate this one! Score!

I tossed the pitta squares with the oil mixture in a bowl before pouring them onto the baking sheet, because I want to get them well and evenly coated. It did the trick, they were so crispy and tasty it was hard to keep them all for the salad.

The only other thing worth mentioning, is that you shouldn’t mix in the pitta till the very last minute, or it will start going soggy.

This salad is great for a side salad, or for a light lunch, even a summer-y dinner. Good stuff!

Tuesday, June 03, 2008

Spring Rolls with Peanut Dipping Sauce


Peanut dipping sauce:
2 tbsp fish sauce
1-2 fresh red chillies, seeded and chopped
1tbsp finely chopped garlic
2tbsp lime or lemon juice
5tbsp water
1tbsp sugar
3tbsp roasted peanuts, crushed

Place all the ingredients into a food processor, and process thoroughly. Transfer to a bowl and let stand for at least 10 min (can be prepared hours in advance).
This sauce is from Ken Hom’s Simple Asian Cookery.


Spring rolls
Round rice paper wrappers
50g Bean thread (transparent) noodles
1 Carrot, peeled and grated
1 block of Tofu in long thin slices (shredded)
Handful of Basil leaves

The spring rolls that went with this dipping sauce had much more stuff in them. So much stuff in fact, that I was not able to make them. I think the wrappers that I got must have been smaller then the ones the recipe called for because I could not fit in all the fillings and still roll them up. They ripped, they popped open, they were an impossible mess. After making three of them, I had to just give up. The dipping sauce on the other hand took seconds to make, and was so good I could hardly believe it. The thought of having the sauce again gave me the push I needed to try the spring rolls again.

This time I just used the ingredients listed. The wrappers need to be soaked in warm water to soften them up (takes about 10 seconds or so), then you need to lay them on a clean kitchen towel, and blot them dry. Next take them off the towel, and put them on your cooking surface (countertop, plate, cutting board, whatever), and lay your fillings in the wrapper, fold the sides in and roll them up. Place them seem side down, and they will stick all by themselves. The wrapper package should have diagrams to help with this.

It takes a couple of tries to get the hang of it, but then once you do, it’s really easy.

These were fun, and with that dipping sauce, I will absolutely do this every time I come across those rice paper wrappers.

Saturday, May 31, 2008

Yellow split pea and frankfurter soup


1 onion
1 carrot
1 clove of garlic
1 stick of celery
2-3 tbsp vegetable oil
½ tsp ground mace
500g yellow split peas
1.25-1.5 litres chicken or veg stock
2 bay leaves
approx. 8 frankfurters

Peel the onion, carrot and garlic. Roughly cut up the onion, carrot and celery, and put them, with the garlic into a food processor and blitz till finely chopped.
Heat the oil in a heavy based wide saucepan on medium heat, add the chopped vegetables and cook for 5-10 min, until soft but not colored

Add the ground mace – this may be a small amount but it’s crucial to the taste – give it a good stir and then add the split peas, and stir again until the are glossily mixed with the oil slicked, cooked down vegetables. Pour over 1.25 liters of stock and add the bay leaves, then bring to the boil. Cover, turn down the heat and cook for about an hour until everything is tender and sludgy, adding more stock as needed. Taste for seasoning once everything is ready. Slice up the frankfurters and throw them into the soup to warm.


This soup was from the Nigella Lawson book Feast.

I bought a pack of hot dogs the other day on a whim, but never got around to making them. We were going to just have them for lunch over the weekend but then I remembered seeing this recipe, and wanting to try it.

There was some confusion about the split peas. The pack I bought said that they had to be soaked overnight. I thought I remembered that split peas don’t really need to be soaked, and the recipe didn’t say anything about it, so I figured I’d just give it a go with the dried un-soaked peas. It worked perfectly. So well in fact that I plan to keep a bag of split peas around for any day when I just don’t know what to make.

This soup is incredibly simple and could easily be made without the hot dogs, which means that it could be made totally vegetarian, and out of staples and store cupboard ingredients. That alone makes it great find. On top of that, it’s also really tasty and comforting and filling.

This one is an all around winner.

Tuesday, May 27, 2008

Spicy Chorizo and avocado salad


4tbsp olive oil
1 small Ciabatta, torn into small bite sized pieces
2 x 80g packs of sliced chorizo
250g baby plum or cherry tomatoes, halved
2tbsp balsamic vinegar
pinch sugar
1 large ripe avocado, halved, stoned and sliced
150g bag of baby leaf and herb salad

Heat 2 tbsp of the oil in a large non-stick frying pan. Fry the ciabatta for 8-10 minutes, tossing occasionally until starting to crisp and brown, then tip into a large salad bowl.
Lay the chorizo in the pan and dry for 2 min until it gives out a red oil. Toss in the tomatoes and cook over a high heat for 1-2 minutes, until they start to soften. Drizzle over the vinegar, add the sugar and season.
Gently toss the avocado, salad and remaining olive oil with the croutons. Spoon over the chorizo and tomatoes and drizzle with any pan juices. Serve immediately.

This salad was so good! It’s not a dieter’s salad at all, but it makes a great summertime dinner. I got it from 101 Seasonal Salads.


I used a lot more balsamic vinegar then the recipe called for, partly because I like it, and partly because I slipped when I was pouring it in. I would actually recommend going a bit heavy on it, it means more dressing.
This was just gorgeous The hot chorizo and tomato contrasted well with the cool creamy avocado, and the croutons were the perfect finishing touch.

My husband has already requested a repeat performance of this dish, and I am only too happy to oblige.

Tuesday, May 20, 2008

Harira (lamb, chickpea and spinach soup)


200g dried chickpeas
1tsp bicarb of soda
3tbsp olive oil
1 large onion, cut into 1cm dice
200g lamb neck fillet, cut into 1cm dice
2tbsp tomato puree
1tbsp caster sugar
1kg tinned chopped tomatoes
1.2 litres chicken stock or water
juice of 1 lemon
1tsp ground cumin
1tsp ground ginger
a pinch of saffron strands
100g baby spinach
4tbsp roughly chopped coriander
4-6 lemon wedges
salt and black pepper

Start preparing the soup the night before by putting the dried chickpeas in a large bowl with the bicarbonate of soda and covering them with plenty of cold water – it should cover the chickpeas by at least twice their height. Leave at room temperature to soak overnight.
The next day, drain the soaked chickpeas, place in a large saucepan and cover with plenty of fresh water. Bring to a boil and simmer for 1-1 ½ hours, until the chickpeas are tender. Drain through a colander and leave to one side.

Place a large saucepan over medium heat and add the olive oil. Add the onion and fry until soft and translucent. Increase the heat, add the diced lamb and cook for 2-3 minutes, until the lamb is sealed on all sides and has taken on a bit of colour. Add the tomato puree and sugar and mix well. Cook for 2 min, then add the chopped tomatoes, drained chickpeas, stock or water, and some salt and pepper.
Bring the soup to the boil and reduce the heat to a simmer. Use a large spoon to skim off any scum that forms on the surface, then cook for about 35 min, until the meat is tender.
Squeeze the lemon juice into the soup. Season the soup with the ground cumin, ginger, and saffron. Taste and adjust the salt and pepper.
When ready to serve, bring the soup back to the boil. Wash and drain the spinach leaves, and chop them roughly. Add the spinach and coriander to the soup just before you bring it to the table.
Serve with a wedge of lemon.

One last one from Ottolenghi The Cookbook. This book is so great.

This is a lovely soup. It’s got that fresh clean taste that lemon and coriander always bring, but it is also quite hearty because of the chick peas and the lamb.

I liked that it didn’t use too much lamb. Enough that everyone had some, but not so much that it was overpowering.

The most amazing thing about this soup, was that the boys ate all of it. They loved it, even the spinach. They even asked for more.

I’d make this one again.

Thursday, May 15, 2008

Couscous with dried apricots and butternut squash


1 large onion thinly sliced
6tbsp olive oil
50g dried apricots
1 small butternut squash (about 450g), peeled, seeded, and cut into 2cm dice
250g couscous
400ml chicken, or vegetable stock
a pinch of saffron strands
3tbsp roughly chopped tarragon
3tbsp roughly chopped mint
3tbsp roughly chopped flat leaf parsley
1 ½ tsp ground cinnamon
grated zest of ½ lemon
coarse sea salt and black pepper

Preheat the oven to 180c. Place the onion in a large frying with 2 tbsp of the oil and a pinch of salt. Saute over a high heat, stirring frequently for about 10 min, until golden brown. Set aside.
Meanwhile, pour enough hot water from the tap over the apricots just to cover them. Soak for 5 min, then drain and cut into 5mm dice.
Mix the diced squash with 1tbsp of the olive oil, and some salt and pepper. Spread the squash out on a baking tray, place in the oven and bake for about 25 min, until lightly coloured and quite soft.
While waiting for the butternut squash, cook the couscous. Bring the stock to the boil with the saffron. Place the couscous in a large heatproof bowl, and pour the boiling stock over it, plus the remaining olive oil. Cover with cling film and leave for about 10 min; all the liquid should have been absorbed.
Use a fork to whisk, or fluff up the couscous, then add the onion, butternut squash, apricots, herbs, cinnamon, and lemon zest. Mix well with your hands trying not to mash the butternut squash. Taste and salt and pepper if necessary. Serve warmish or cold.

This is another from Ottolenghi The Cookbook.

I’m always looking for a new way to serve couscous. It’s easy and fast and the boys love it. This recipe was a really good one. The squash and apricots are always a nice combination, but it was the fresh herbs that really put it over the top. They make the dish taste really summer-y and light.

Cooking the squash takes a little time, but you could always do that part in advance, the rest of it is a breeze. I would make this again.

Saturday, May 10, 2008

Car Cakes

So it was my youngest son’s third birthday party today. They grow up so fast!


He requested a cake in the shape of a car, so I figured I’d give it a go. In the end I decided I’d better make two, just to make sure we had enough. I could have just made a bigger one, but then I couldn’t have used my all time most favorite cake recipe ever.

This is a cool trick. It’s an old fashioned way of making a Victoria sponge. Instead of using set measurements, weigh your four eggs, in their shells. Make a note of how much they weigh, and then weigh out that same amount of flour, butter, and sugar. Equal parts of each.

Cream the butter and sugar together, then add the eggs one at a time. Make sure each egg is fully blended in before adding the next. Then add a tsp of vanilla, and blend in. Add the flour and a pinch of salt, and fold it in. If the batter is too thick, add some milk to loosen it up.

Pour into two 20cm tins and bake at 180c for 25-30 min.
Test with a toothpick to see if it’s done.

I especially like using this recipe because the cake is even better after sitting in the fridge overnight, so you have a little extra time to work with. You can bake them, cool them, wrap them and put them in the fridge the day before you need them. Then on the day of, just cut them up and stick the bits together with frosting till you get the right shape.


These came out pretty cute, and the birthday boy loved them, which is the most important thing.

Wednesday, May 07, 2008

Kosheri


300g green lentils
200g basmati rice
40g unsalted butter
50g vermicelli noodles, broken into 4cm pieces
400ml chicken stock or water
½ tsp grated nutmeg
1 ½ tsp ground cinnamon
1 ½ tsp salt
½ tsp black pepper
4tbsp olive oil
2 white onions, halved and thinly sliced

For the sauce
4tbsp olive oil
2 garlic cloves, crushed
2 hot red chilies, seeded and finely diced
8 ripe tomatoes, chopped (tinned are fine)
370ml water
4tbsp cider vinegar
3tsp salt
2tsp ground cumin
20g coriander leaves, chopped

Start with the sauce. Heat the olive oil in a saucepan, add the garlic and chillies and fry for 2 minutes. Add the chopped tomatoes, water, vinegar, salt and cumin. Bring to the boil, then reduce the heat and simmer for 20 min, until slightly thickened. Remove the sauce from the heat, stir in the coriander and then taste. See if you want to add any salt, pepper or extra coriander. Keep hot, or leave to cool; both ways will work with the hot kosheri. Just remember to adjust the seasoning again when cold.

To make the kosheri, place the lentils in a large sieve and wash them under a cold running tap. Transfer to a large saucepan, cover with plenty of cold water and bring to the boil. Reduce the heat and simmer for 25 min. The lentils should be tender, but far from mushy. Drain in a colander and leave to one side.
In a lagre bowl, cover the rice with cold water, wash and then drain well. Melt the butter in a large saucepan over a medium heat. Add the raw vermicelli, stir and continue frying and stirring until the vermicelli turns golden brown. Add the drained rice and mix well until it is coated in the butter. Now add the stock or water, nutmeg, cinnamon, salt and pepper Bring to the boil, cover and then reduce the heat to a minimum and simmer for 12 min. Turn off the heat, remove the lid, cover the pan with a clean tea towel and put the lid back on. Leave like that for about 5 min; this helps to make the rice light and fluffy.
Heat the olive oil in a large frying pan, add the onions and sauté over a medium heat for about 20 min, until dark brown. Transfer to kitchen paper to drain.

To serve, lightly break up the rice with a fork, and then add the lentils, and most of the onions, reserving a few for garnish. Taste for seasoning and adjust accordingly. Pile the rice high on a serving platter and top with the remaining onions. Serve hot, with the tomato sauce.


Hey,

Sorry I’ve been gone so long. I’ve still been cooking like mad, just took a quick break from the blogging. Since my year of a new recipe every day ended, I haven’t been making a point of making something new every day anymore, but I’d say I’m still averaging 4 or 5 new recipes a week. It’s just been so much fun, and I’ve been learning so much, there’s no way I can stop now.

This dish is an Egyptian dish from the book, Ottolenghi The Cookbook. This is a beautiful book, and the recipes are wonderful. It’s not a vegetarian book, by any stretch, but it has a stunning array of vegetable dishes.

This one sounds like It would be odd, but it’s total comfort food. Very healthy, very tasty.

I used brown rice and pasta instead of white, so I had to add a little more liquid during the cooking, and I also had to let it simmer for about twice as long, but it still came out beautifully.

The sauce was a little too spicy for the boys, but they just ate it without, and they cleaned their plates, they loved it.

It’s not quick and easy. There are many parts that have to be made separately, and then combined at the end, but it’s not that bad. I will make this again.

Tuesday, April 15, 2008

Paper Chef Challenge #28- The Few But Mighty Roud Up


This one was kind of difficult with the offal. Not so readily available, palatable or easy to prepare, but the few but mighty took to it with zest.

In order of entry:


From Magnus Akesson an addmitted non-lover of the offal (and I apologize, Magnus for putting you through it) from Amsterdam, made a beautiful Toasted quinoa bread with chicken paté on a fennel salad.

I just today found wild fennel growing in the alley outside my house. I just wonder how much motor oil it soaked up in growing.


Hank Shaw of www.honest-food.net and fellow Californian hunted down his offal the old fashioned way -- and you can read the whole account here. He made a dish called Mountain, Marsh & Field, with not 1, but 2 kinds of offal. Great name to match the dish.


This entry from Ilva, the Grand Dame of the Paper Chef Challenge is an ORANGE SCENTED CHICKEN LIVER PATE' WITH MARSALA JELLY SERVED ON QUINOA PAN BREAD or PATE' DI FEGATINI AROMATIZZATO CON ARANCIA E MARSALA

All caps, because I don't dare re-type for fear of misspelling. An for those who can read Italian, the words actually do roll off your tongue.

Ilva, I thought it impossible to take an inviting picture of pate, but you did it. Equally impressive, she chose her seasonal ingredient from her trans-gender lemon/orange tree.


And mine, chicken gizzards, Indian Chinese Style.


I'm giving the helm for Paper Chef #29 and the 1st prize to Hank. You can't beat 2 offals, one being rabbit kidney, combined with a stunning presentation. And then there is the whole hunting it down himself thing. ...

Thanks everyone for taking part! It was great.
Cookbad

Thursday, April 10, 2008

gobi manchurain gizzards with cilantro lemon quinoa

By CookBad

Here is my entry for Paper Chef #28. The challenge was to make something with offal, quinoa, spring onions and whatever is in season in you area. I chose lemons, from the lemon tree in my front yard and cilantro, which I grow in a pot on my porch.

I loved this Gobi Manchurian recipe from the January 2008 issue of Saveur much I tried it with chicken gizzards instead of cauliflower and it was great. The recipe for the gobi is here and I just switched out the cauliflower for gizzards.


The quinoa was stright forward enough:
Cook quinoa in a 4- to 5-quart pot of boiling salted water, uncovered, until almost tender, about 10 minutes. Drain in sieve, then set sieve over same pot with 1 inch of simmering water (water should not touch bottom of sieve). Cover quinoa with a folded kitchen towel, then cover sieve with a lid (don't worry if lid doesn't fit tightly) and steam until quinoa is tender, fluffy, and dry, about 5 minutes. Remove from heat and let stand (still covered) 5 minutes.
Mix with chopped cilantro, lemon zest and spring onions.

Tuesday, April 08, 2008

Broiled Eel Liver aka EVIL

oh hell no.

By now a little sick Cookbad

Please make the flavor leave my mouth. Please please. 2 diet cokes and some mouthwash and I still have a flavor reminiscent of bile in my mouth. It most likely is actually bile. Eel bile.

Nice.

So, this isn't going to be the offal I use for the Paper Chef Challenge.

WTF is that white pearly sac? I'd be willing to bet a cup of demi-glace it is a bile sac.

Saturday, April 05, 2008

Mango, Raspberry and Whipped Cream Profiterole with Mint


By Cookbad

I've had make your own pizza parties & decorate your own cupcakes but next time around, I'm going to do make your own profiterole aka cream puff event.

Because, really, what awesome dessert madness can't you build between two halves of choix.

Here is the line up for just the basics:
ice cream
chocolate sauce
whipped cream
various berries and diced fruit
chopped nuts
creme filling- fluffy and creamy
chocolate mouse
fruit coulis of many flavors
citrus curd
sprinkles
chiffonade some mint

And if you don't like the little puff, just turn in into a sunday.

I plan to build one a foot high someday.
Yeah, I know, I'm wickedly ambitious.

Here is the plain old one I made the other night:
All recipes from various sources:
Mango, Raspberry and Whipped Cream Profiterole with Mint
Pastry:
1 cup water
1 stick margarine or butter
1 cup sifted all-purpose flour
4 eggs

Preheat the oven to 400 degrees F.
Heat water and margarine or butter to boiling point. Add flour and stir constantly until mixture is smooth and forms a ball when tested in cold water. Remove from heat and let cool. Beat in 4 eggs, one at a time. Drop dough from teaspoon to form small eclairs onto greased cookie sheet. Bake for approximately 30 minutes or until light brown.

Berry Coulis:
500g fresh or frozen berries, cherries, peaches or apricots
3-5 tablespoons sugar, to taste
fresh lemon juice to taste
Purée the fruit in a food processor or blender add sugar, and lemon juice. Press the fruit through a sieve, tamis or chinois and discard remaining solids.
http://en.wikipedia.org/wiki/Tamis

http://www.cooking.com/products/shprodde.asp?SKU=138858
Mango Curd:
1 or two ripe mangos, peeled, pitted, and diced. Perfect for over ripe mangos.
1/2 cup sugar
1.5 tablespoons fresh lemon juice
Pinch of salt
4 large egg yolks
2 tablespoons of unsalted butter, cut into small pieces

Puree first 4 ingredients in processor, scraping down sides of work bowl occasionally. Add yolks; puree 15 seconds longer. Strain through sieve set over large metal bowl, pressing on solids with back of spatula to release as much puree as possible. Discard solids in sieve.

Set metal bowl over saucepan of simmering water (do not allow bottom of bowl to touch water); whisk puree until thickened and thermometer registers 170°F., about 10 minutes. Remove from over water. Whisk in butter 1 piece at a time. Cover and refrigerate overnight.

Chiffonade up some mint.

Combine into a pile of good.


Any leftovers are fair game for eating with a spoon in front of the fridge at 3 in the morning before anyone else can get to them.

I good shot at making a Ballotine


By Cookbad

This is the story of what happens when you read (really glance over) a technique, misplace the book you saw it in and then go ahead and make it anyway with out even consulting the internet.

A ballotine is a de-boned bird of any kind or fish that is stuffed, tied up and braised or poached.

Not quite a fail, but it could have been done with more finesse. Still a ballotine might always call for some extra grace in preparation until you become expert at doing it.

Mine came out boarder-line comical and looked like something my 5 year old would have done to her little brother if left alone with enough rope.

You can stuff a ballotine with meat or stuffing, and I went with stuffing.
Here is how it went down:

Ballotine with Fig and Pecan Stuffing
I made some stuffing by browning some mirepoix in olive oil then adding some:
shallot
bay
rosemary
parsley
sage
salt
pepper
garlic
Brown some more, deglaze with:
1/2 cup stock
Then I added:
fig
pecans
1/2 baguette day old or toasted, ripped into smallish chunks
& more stock
Then I let the stuffing chill.


My sister who ran the gambit and got her chefs degree in Paris gave me a nice little tip to chill your stuffing. Adding it hot possibly allows the interior stuffing to come to just the temperature that bad bacteria love and may or may not give you some sort of food poisoning.

Next, prepare a de-boned chicken (I had my butcher de-bone it and kept the bones for stock) by pounding the breast out some and removing the wings. Salt the inside.

Cut a large piece of kitchen twine. I really shouldn't tell you how to do it as mine was so funky, but here is it. . .
Lay the kitchen twine under the bird in such a way that it runs along where the spine used to be.

Then, add 1-1.5 cups of the stuffing on top if the center of the bird and press it down evenly.
adding a few asparagus spears it the center is optional, but it tastes good and looks pretty in the end. Now, fold the bird inward as tightly and evenly as possible. Bring the kitchen twine around it, so it meets close to the bottom of the bird, twist the strings together as you would wrapping ribbon around a package, then flip the bird and proceed to wrap the twine around it 3 or four times at evenly spaced increments.

Make sure the twine is tight evenly, then tie it off and cut off any extra twine or chicken bits.


Salt the exterior.

Now braise it in a heavy bottomed pan over med high heat until the exterior is evenly browned.

Pop in the oven at 400 and cook for 45 minutes.

Remove, let it rest 15 minutes to half and hour. Slice thru the twine and slice as you would a loaf of bread. Use the pan drippings for gravy or just spoon it over the meat.


Mine came out slightly underdone just at the point where it cooked against the asparagus. This is because I put them in while still partially frozen. Not so smart. I was trying to over compensate for the fact I hadn't let my stuffing cool very much. My bad. I just pulled that piece out and served myself that section just in case.

It was good. And sloppily elegant if that makes any sense. I also liked the fact that the bones are left out and uncooked to make a proper light stock with later.

So, not so much a fail, as I think about it.


Thursday, April 03, 2008

Paper Chef Challenge #28: The ingredients are. . . .


ROUND UP HERE

Here is it is:
The challenge is to come up with a dish and make it by April 8th from the following ingredients.

Any kind of offal (it's making a comeback!), quinoa, spring onions and something that is growing now & in season your area (meat included).

The last part is inspired by the woman behind the challenge, Lucullian delights amazing strawberry dish, which are certainly stating to pop up in some part of the world.

If you are still stuck under 3 feet of snow, then pick ingredient that you are most looking forward to having fresh in spring.

All entries must be in by midnight PST on April 8th.

Send the following to favolaus@gmail.com:
• A little picture of the dish, and what you call it.
• A link to your blog URL
• A link to the post that your dish is on
• You name
• Anything else you would like me to add

Looking forward to seeing them all!

Cookbad

Tuesday, April 01, 2008

Getting Ready for Paper Chef Challenge #28

ROUND UP HERE

Be part of one of the longest running food blogging challenges -- Paper Chef #28!

It is on now:
Go here for the challenge list of ingredients. . .

I was thrilled to win last months Paper Chef hosted by Lucullian Delights with my Cilantro, Pistachio, Ancho Chile Rubbed Chicken with Stinking Rose Polenta, and as the winner, I get the honor of hosting it this month.

Owen of Tomatilla who started Paper Chef describes the challenge as:

"Food bloggers in the US and Japan and many other parts of the world will be familiar with "the Iron Chef" cooking show. Great chefs are put up against one of the iron chefs in a rather over-the-top and dramatic cooking competition to see who can make the most spectacular food from a host of regular ingredients and one special ingredient - say octopus. There is a somewhat similar TV show in Britain called "Ready, Steady, Cook!"

So, check back on Thursday April 3rd at noon EST. I'll announce the 4 ingredients -- The first 3 ingredients will be regular food stuff and the 4th will be something topical, seasonal or trendy.

Over the next 5 days submit your entry at any point. Tuesday, April 8th at noon the challenge will end and I'll do a round up a couple days after that.

Me and my co-blogger, AteThat will chose the winner, and will also be announcing a Readers Choice winner. The winner of this months challenge gets to host next months challenge.

Monday, March 31, 2008

Basted Egg and Fried Parsley Sandwich on Gougère


By Cookbad

After my earlier gougère fail, I still had some of the dough left. . . or is it batter?

I decided to make large scale failing gougères, which turned out quite nicely, cheesey and between popover and brioche.

Then I basted some eggs, which is my new favorite way to make them.

You melt much more butter than is healthy to consume into a pan ocer med to low medium heat and let it melt.

Crack and egg into the pan and baste them by pouring the hot melted butter, spoonful by spoonful over the top of the egg until just as the very top of the yolk turns white, like in the below pict. Then it's done and can go on top of the sliced open gougère.

perfectly finished basted egg. Remove from heat when the top of the yolk shows white.

Then sautee up some chopped fresh parsley in the butter for 1-2 minutes, throw it on the egg, salt, eat.

Gougères

Perfectly puffed up choux next to my gougères FAIL
By Cookbad

Gougères are profiteroles cheesy cousin.

You can stuff them the same way you would any choux pastry, but I cannot seem to get mine to puff up as they should.

I used to make these by just adding some grated cheddar or gruyère cheese to a simple choux recipe. They never puffed up and reminded me more of tiny little souffle that anything choux.

I've made this recipe that I am posting 4 times now and they have never ever puffed up the way cream puffs do, and they should. . .they are on the cover of the book they come from looking all golden, puffy and self satisfied. . . mocking me. . .

smug gougères
See what I mean?

They are from this terrific book called Bite Sized by François Payard that is about just one it sounds like. Great stuff, much of it pretty expensive to make.

Anyway. . . .

Why do I continue to make a recipe that fails? Because they taste really really good. They go so fast that I don't think I have ever actually tasted a cold one.

Here is the dubious recipe in question.
Gougères
6 tablespoons (3/4 stick) butter
3 1/2 cups plus 2 tablespoons all-purpose flour, sifted
pinch of salt
pinch of freshly ground nutmeg
5 large eggs
5 ounces (1/2 cup plus 2 tablespoons) heavy cream, slightly heated so it is warm to the touch
3 1/2 cups grated Gruyère cheese, plus more for garnish if desired

1. Preheat the oven to 400°F. Line a baking sheet with parchment paper.

2. Place 1 cup water and the butter in a medium saucepan over medium-high heat and bring to a boil. Then reduce the heat to low and add the flour, salt, cayenne, and nutmeg. Cook the mixture fro 15 to 20 minutes, stirring constantly, until it turns into a thick paste and no longer sticks to the sides of the pan.

3. Transfer the batter to the bowl of an electric mixer fitted with the paddle attachment. Mix at low speed, incorporating the eggs one at a time. Do not add an egg until the previous one is completely incorporated.

4. Add the cream to the batter while the mixer is running. Then stop the mixer and gently stir in the grated Gruyère with a spatula, making sure not to deflate the dough.

5. Fit a pastry bag with a #5 or 1/2 inch star tip, and fill it with the dough. Pipe 1-inch rounds of the dough onto the prepared baking sheet. Wet your finger and smooth out the top of the gougères. Bake for 10 to 15 minutes, until golden brown.

6. Remove from the oven and sprinkle grated Gruyère on top if desired. Arrange on a platter and serve warm.


FIRST, I think using a paddle to mix is silly silly madness and maybe a translation error, but this guy speaks perfectly good english, so I don't know what he is thinking. And, I'm also no sure at one point during the paddling the dough turns into any condition in which you would have to worry about deflating it while adding cheese.

SECOND: 10-15 minutes doens't come close. I think half an hour is more like it

Last change for this one. I'm moving on.