Showing posts with label original recipes. Show all posts

Tuesday, April 15, 2008

Paper Chef Challenge #28- The Few But Mighty Roud Up


This one was kind of difficult with the offal. Not so readily available, palatable or easy to prepare, but the few but mighty took to it with zest.

In order of entry:


From Magnus Akesson an addmitted non-lover of the offal (and I apologize, Magnus for putting you through it) from Amsterdam, made a beautiful Toasted quinoa bread with chicken paté on a fennel salad.

I just today found wild fennel growing in the alley outside my house. I just wonder how much motor oil it soaked up in growing.


Hank Shaw of www.honest-food.net and fellow Californian hunted down his offal the old fashioned way -- and you can read the whole account here. He made a dish called Mountain, Marsh & Field, with not 1, but 2 kinds of offal. Great name to match the dish.


This entry from Ilva, the Grand Dame of the Paper Chef Challenge is an ORANGE SCENTED CHICKEN LIVER PATE' WITH MARSALA JELLY SERVED ON QUINOA PAN BREAD or PATE' DI FEGATINI AROMATIZZATO CON ARANCIA E MARSALA

All caps, because I don't dare re-type for fear of misspelling. An for those who can read Italian, the words actually do roll off your tongue.

Ilva, I thought it impossible to take an inviting picture of pate, but you did it. Equally impressive, she chose her seasonal ingredient from her trans-gender lemon/orange tree.


And mine, chicken gizzards, Indian Chinese Style.


I'm giving the helm for Paper Chef #29 and the 1st prize to Hank. You can't beat 2 offals, one being rabbit kidney, combined with a stunning presentation. And then there is the whole hunting it down himself thing. ...

Thanks everyone for taking part! It was great.
Cookbad

Saturday, April 05, 2008

I good shot at making a Ballotine


By Cookbad

This is the story of what happens when you read (really glance over) a technique, misplace the book you saw it in and then go ahead and make it anyway with out even consulting the internet.

A ballotine is a de-boned bird of any kind or fish that is stuffed, tied up and braised or poached.

Not quite a fail, but it could have been done with more finesse. Still a ballotine might always call for some extra grace in preparation until you become expert at doing it.

Mine came out boarder-line comical and looked like something my 5 year old would have done to her little brother if left alone with enough rope.

You can stuff a ballotine with meat or stuffing, and I went with stuffing.
Here is how it went down:

Ballotine with Fig and Pecan Stuffing
I made some stuffing by browning some mirepoix in olive oil then adding some:
shallot
bay
rosemary
parsley
sage
salt
pepper
garlic
Brown some more, deglaze with:
1/2 cup stock
Then I added:
fig
pecans
1/2 baguette day old or toasted, ripped into smallish chunks
& more stock
Then I let the stuffing chill.


My sister who ran the gambit and got her chefs degree in Paris gave me a nice little tip to chill your stuffing. Adding it hot possibly allows the interior stuffing to come to just the temperature that bad bacteria love and may or may not give you some sort of food poisoning.

Next, prepare a de-boned chicken (I had my butcher de-bone it and kept the bones for stock) by pounding the breast out some and removing the wings. Salt the inside.

Cut a large piece of kitchen twine. I really shouldn't tell you how to do it as mine was so funky, but here is it. . .
Lay the kitchen twine under the bird in such a way that it runs along where the spine used to be.

Then, add 1-1.5 cups of the stuffing on top if the center of the bird and press it down evenly.
adding a few asparagus spears it the center is optional, but it tastes good and looks pretty in the end. Now, fold the bird inward as tightly and evenly as possible. Bring the kitchen twine around it, so it meets close to the bottom of the bird, twist the strings together as you would wrapping ribbon around a package, then flip the bird and proceed to wrap the twine around it 3 or four times at evenly spaced increments.

Make sure the twine is tight evenly, then tie it off and cut off any extra twine or chicken bits.


Salt the exterior.

Now braise it in a heavy bottomed pan over med high heat until the exterior is evenly browned.

Pop in the oven at 400 and cook for 45 minutes.

Remove, let it rest 15 minutes to half and hour. Slice thru the twine and slice as you would a loaf of bread. Use the pan drippings for gravy or just spoon it over the meat.


Mine came out slightly underdone just at the point where it cooked against the asparagus. This is because I put them in while still partially frozen. Not so smart. I was trying to over compensate for the fact I hadn't let my stuffing cool very much. My bad. I just pulled that piece out and served myself that section just in case.

It was good. And sloppily elegant if that makes any sense. I also liked the fact that the bones are left out and uncooked to make a proper light stock with later.

So, not so much a fail, as I think about it.


Monday, March 31, 2008

Basted Egg and Fried Parsley Sandwich on Gougère


By Cookbad

After my earlier gougère fail, I still had some of the dough left. . . or is it batter?

I decided to make large scale failing gougères, which turned out quite nicely, cheesey and between popover and brioche.

Then I basted some eggs, which is my new favorite way to make them.

You melt much more butter than is healthy to consume into a pan ocer med to low medium heat and let it melt.

Crack and egg into the pan and baste them by pouring the hot melted butter, spoonful by spoonful over the top of the egg until just as the very top of the yolk turns white, like in the below pict. Then it's done and can go on top of the sliced open gougère.

perfectly finished basted egg. Remove from heat when the top of the yolk shows white.

Then sautee up some chopped fresh parsley in the butter for 1-2 minutes, throw it on the egg, salt, eat.

Sunday, March 30, 2008

Coconut & Lemongrass Shrimp Cakes with a Spicy Mango & Cucumber Salsa

my crappy camera phone pictures strike again.

By Cookbad

Hooray! Royal Food Joust -- My first .

The challenge was to use seafood, lime and coconut. It got me thinking about a recipe I made last year for shrimp cakes, so I thought I would reprise, without peaking at the original version

I made coconut & lemon grass shrimp cakes with a spicy mango & cucumber salsa.

This recipe made me want to write about the easiest way to prepare a coconut. You don't have to smash it on the ground (most fun method!) of take the back of a cleaver to it (grrrr).

Find a coconut that you can hear a lot of milk sloshing around in. Poke out the eyes & drain it. Put in the the oven at 350 for 30 minutes. The heat causes it to split apart --for easy opening and also causes the meat to release from the shell.

Another way way to shred up fresh coconut it to get yourself a kudkuran, which is a bench coconut grater. Here is a picture of one in use:

Dude grating coconut using a bench grater.

And just an apology about photo quality. . . .
Also, damn the fact I keep coming up with new and interesting places to hide my camera from children that prevents me from finding it too. Anyone who can tell me where my camera is-- I promise to paypal you 50 bucks. No Joke. Camera phone does not cut taking pictures of food.

Bear with my recipes. They are just architecture- Flavor adjustment in expected.
And let me know if there is anything that's unclear. I love feedback.

Coconut & Lemongrass Shrimp Cakes with a Spicy Mango & Cucumber Salsa
Serves 2-4

SALSA:
2 mangos chopped. Over ripe works wonderfully
1/2 cucumber diced. Seed and peel if you feel like it
chile paste-- again to taste
handful of unsweetened shredded coconut
handful fresh mint
1 diced shallot
juice of 1 lime
2 tablespoons of sugar
1-2 tablespoons fish sauce

But everything BUT half the cucumber into a food processor. Pulse. Just to get it to mix, but not to a pulp. Combine with remaining cucumber.

Let this sit in the fridge for the flavors to marry while you make the shrimp cakes.

SHRIMP CAKES:
1 lb. raw shrimp
lemon grass. . I'd say 1/2 a stalk but I use this extremely convenient shredded frozen stuff I bough in Little Saigon.
1/2 chopped fresh coconut
a hand full of green beans
just a bit of lime zest
chile paste to taste
tablespoon fish sauce
1/4 - 1/2 can of coconut milk
handful fresh cilantro
2 tablespoons olive oil
salt
panko, optional

Put everything but the panko into a food processor, and blend. Don't expect the coconut to fully blend, it adds a nice texture in the end. If they mixture looks thin, add some panko and stir.

oil to fry, plenty

Heat a heavy bottomed pan to med-high, add oil. Form shrimp mixture into cakes. Big ones for dinner, small ones make a snazzy appetizer.

Fry them until the are browned, flip, repeat. They don't take much time to cook thru, but it's nice to get them brown.

Serve with salsa on the side and a garnish of chopped mint, cilantro and maybe crushed pistachios, but I skipped that part.


These were good. I ate mine standing up in the kitchen while frying up the next batch I was so all over them.

Just one last little coconut nugget of information:

The milk from green coconuts is supposed to be great for a hangover, among other things. I bought some slightly fermented green coconut juice, called kefir at Whole Foods last week & it was really interesting.

Thursday, March 20, 2008

How to make Sprouted Wheat Bread: Part 1

The perfect sized sprout for bread

By Cookbad

I'm working on the right proportions to sub in sprouted wheat for wheat flour in bread. Once wheat goes from just a seed to a sprouted seed a whole bunch of it's properties change. They increase in digestive enzymes, proteins, good fats and fiber, overall making a healthier more complex carbohydrate bread.

With all those good things in mind, I'm not sure what replacing regular wheat flour with sprouted wheat will do to the dough. I'm curious to see how the gluten is effected.

BUT FIRST, I need to sprout some wheat, which is pretty much as easy as growing mold on bread.

I invested 8USD in a sprouting jar --it's just a large glass jar with a lid that is made of wire mesh. You can easily improvise one by replacing a large regular jar's lid with either cheese cloth held in place with a tight rubber band. Easier still, poke a bunch of holes in the lid of a jar. Don't use too small a jar. The seeds need room to breath.

Next, I put to use some wheat berries that have been sitting in the back of my pantry for 5 months. Wheat berries are wheat flour before it's ground down and processed.

What I did was:
Throw a handful or two in the jar with 3 cups of water and leave them to soak overnight, 8-16 hrs. Then, empty out the water, and rinse the berries by adding some more water to the jar, swishing it around some and then pouring it out. Do that twice.

Rinse them once or twice a day for the next 48-72 hrs.

In about 48 hours some will show tiny spouts. When most have 1/8-1/4 inch shoots -- like in the picture they are ready for bread making.

I'm going to try 2 different things with my sprouts. I put half in the freezer and the other half, I'm going to mill into flour.

To mill then into flour they need to be dehydrated, which is you can do in an oven at low heat. Spread them on a baking sheet and put them in your oven at 200 max. My oven is ancient and doesn't want to go below 300 no matter how low I set it, so I just left the door slightly open and checked them every 5 minutes, stirring them each check so the ones on the outside didn't get toasted. It took about an hour for them to dry. I checked by taking one berry out, letting it cool and then biting it. If ti was soft, they were still damp.

Eventually, one cracked under my teeth, so I turned off the oven and let them continue to dry. There they sit, waiting to take a turn in my soon to be very cleaned out coffee grinder/ flour mill.

Stay tuned.
S

Super Food Strata with roasted red pepper and tomato coulis

Healthy, hearty, and as simple as popping in the oven in the morning.

By Cookbad

I thought up this one for the Weekend Breakfast Blogging Balanced Breakfast Challenge!

A strata is a kind of eggy bread puddinngish breakfast dish that you make the night before and let sit overnight so the bread becomes almost custardy. It can be sweet, savory or both. It is perfect breakfast if all you want to do is pop something in the oven and don't want to do any prep. in the morning.

I've been working hard at getting my strata recipe down and think I have it.
For any kind of strata you want to make, a good guideline is:

For every 3 eggs you want use 2 cups of shredded bread and 3/4 cups of milk.
For a 3 egg strata use about 1.5 -2 cups of filling, and all the herbs and spices you like.

A couple more strata tips:
Cook your strata in a deeper souffle of oven ready sauce pan, not a flat casserole dish.

If the egg doesn't cover the bread, add a bit more.

If you are going to use a vegetable, cook it down first so it doesn't drown your strata and make it end up soggy.

Stratas do not photograph well.

Here is the recipe:
Super Food Strata with roasted red pepper and tomato coulis
FOR THE STRATA
In a heavy bottomed pan over medium heat:
2 tablespoons olive oil
Cook until soft:
4 clove crushed garlic
1 diced onion
Add:
5 oz. cremini mushrooms quartered and browned
Then cook for 3 minutes:
6 oz. baby spinach
1 tablespoon soy sauce
Let it cook a bit then in a souffle dish or deep oven proof bowl mix the vegetables with:
4 cups shredded whole grain crusty bread
1/3 cup of your choice of cheese, grated of crumbled (optional)
Beat together:
6 eggs
1.5 cups of milk
1 teaspoon salt
1/8 teaspoon pepper cayenne pepper
ground black pepper to taste
Pour the eggs over the bread and vegetables mixture, cover and set in the fridge overnight.

THE ROASTED PEPPER AND TOMATO COULIS:
Put all of the following into a food processor and pulse to blend:
1 roasted red pepper
1 tomato that has been chargrilled and peeled. You do this by just setting the tomato over your gas flame until the skin pops and turns black.
1 clove of garlic
juice of 1 lemon
salt to taste
1/4 cup EVOO
1/3 toasted walnuts

Take the strata out of the fridge 30 minutes before you want to cook it. Take the coulis out to so it has time to get to room temperature before serving.
Preheat the oven to 350.
Bake 45 minutes covered.
It should be puffed up and starting to brown.
Serve with a dollop of coulis.
That lump of orange stuff is the coulis

I opted out of the cheese, but next time I make this I'm thinking fontina.

Also, the coulis is really good all on its own. I put it on a sandwich and turned it into a dip all while waiting for my strata to get down soaking.

Pizza + Beer = fun

I'd had more than a few spicy & sweets before I got took these less than awesome pictures.

By Cookbad


I made a really good pizza the other night. Maple Chipotle Soaked Pineapple & Ham Pizza and I served it with a beer cocktail that I named the Spicy & Sweet Shannon. the pictures are pretty bad. I'd had a few drinks, I was quivering with hunger. . . .

The Pizza:
Slice up some fresh pineapple. About 1 quarter a pineapple is enough for 1 pizza.
Cut into 1/8s and then slice them about 1/4 inch thick. Put them in a bowl with 1/4 cup maple syrup, 1/4 cup water and a chunk or two of canned Chipotle peppers.
Marinde for 30 minute or more.
When they have marinaded, put the pineapple in one layer on a baking sheet, pour over some of he marinade and broil until the tops start to brown a bit.
Get some ham and slice it up into strips.
Dress you pizza


Next, go here for detailed directions on how to make grilled pizza or do it however you want. Top with sauce, cheese, the roasted pineapple and ham. We made this pizza on a particularly shitty grill so it took forever and I eventually just decided to finish it up in the oven.


The Spicy and Sweet Shannon:
All these flavors can be adjusted to your taste.
Pour all this into a pitcher:
1/2 cup of lemon juice
1/4 cup of maple syrup
a few shakes of cayanne pepper
Ice
4 light beers

Pour over more ice.

If you are thinking that it sounds an awful lot like the master cleanse with beer, you'd be right.
Sounds gross, but everyone that tried it really liked it.

The pizza, was terrific. I have been thinking about it for days.

Saturday, March 15, 2008

Tiny Timballos

By Cookbad

Timballos, timpanos, whatever you want to call them . . . are upsidedown savory pies filled with pasta, sauces, vegetables, anything you want arranged in layers to create a dramatic effect when it is cut into. A couple of years ago I made a crustless one, but more commonly you build one by layering the bottom of a souffle dish or round bottomed pan with a thin dough, add the fillings layer by layer and then bake. Mostly when I try to get the pie out of the pan it has been sticking and falling apart, but it tastes good and the kids will eat it, so I keep trying.

Last night I tried to make tiny single sized versions for The Mini Pie Revolution mini pot pie event. I've made these mini pork pies in the past with great success, but this is the first time I made up a mini (or any) pie recipe.

So here goes:

Makes about 6 small pies in various sized ramekins:

CRUST:
2 2/3 cups all purpose flour
1 teaspoon salt
1 teaspoon of ground black pepper
1/3 grated asiago cheese
12 tablespoons (1.5 stick) chilled unsalted butter, cut into 1/2-inch pieces
4 tablespoons chilled solid vegetable shortening, cut into 1/2-inch pieces
6 tablespoons (or more) ice water

In a food processor, mix the first 4 ingredients, then pulse in the butter and shortening until it looks grainy. Then add the water. Continue to pulse a few more times. Form the dough into a ball and put in the fridge for 30 minutes.

PASTA:
2-4 oz. of penne cooked 2 minutes less than the preparation calls for.
enough sauce to cover pasta

BECHAMEL SAUCE:
2 tablespoons butter
2 tablespoons diced onion
2 tablespoons flour
1.5 cups milk
1/4 cup asiago cheese, grated
Sweat he onions in the butter over med heat then add flour and for 2 minutes stir constantly. Add milk, and whisk until fully combined. Set over medium-high heat and whisk till as it simmers. Add asiago and simmer for 8 minutes.
When it is done, add:
1/2 cup of frozen peas

6 hard boiled quail eggs

A bit of extra asiago cheese

TO ASSEMBLE:
Liberally flour your surface and roll out the dough to no less than 1/4 inch. Place the ramakin you are using onto the dough, then cut a circle around it that is 2 inches + bigger than the raminkins imprint. Then, cut a shape directly around the lid of the ramekin. Remove extra dough, then roll the larger circle out some more. The dough should be as thin as you can work with it. Grease, spray or butter your ramakin. Then, gently lift the larger round, place and work it into the ramakin. If there is gross excess in spots, cut it out and seal it.

Take your tomato covered penne and lay them in a row at the bottom of the pie. Fill in the edges with more penne. Then, make another layer.

Scoop about 2-3 table spoons of your peas and bechamel mixture over the pasta. Then very gently press the quail egg down thru the pea mixture. Ideally it will be standing perfectly upsidedown.

Layer some very thin slices of asiago then cover with another arranged layer of penne.

Place the smaller crust on top and seal with the lower crust.

Pop in to oven at 350 for 45 minutes. Check on it, and if the upper crust is burning, take it out.

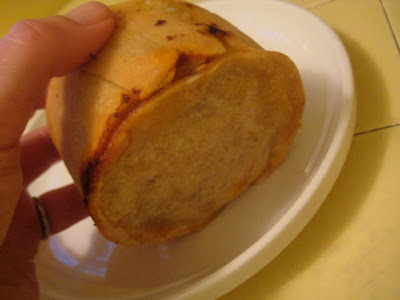
When you take it out, place it upsidedown on a plate. It may or may not fall onto the plate. Ideally, they fall out of the ramekins after a bit of cooling. If they stick, I've tried chilling it got get it to fall, heating it on the plate to get it to fall, but sometimes it just won't. Then you have a classic pot pie, that will taste just as good.

Leftover bechamel and tomato sauce can be combined and poured over pies if you like.

I'm really sad about the grey circle around the egg yolk, but that comes from over cooking and I can't figure a way around it after 45 minutes in the oven.

Friday, March 14, 2008

four berry maple and mascarpone strata

stratas do not photograph very well, but are delicious.

By Cookbad

I've been experimenting with stratas a lot lately to see if there is a ratio of egg to bread to milk to filling that would work for any kind of strata be it sweet, savory or in between.

I made this one using my strata ratio of bread:egg:milk being about 6:6:1.5 and if came out splendidly.

4 Berry Maple
& Mascarpone Strata
6 eggs
6 cups of ripped up whole grain crusty bread
1.5 cups of milk
1.5 cups of maple syrup
2 teaspoons of vanilla
1 teaspoon of cinnamon
4 oz. mascarpone cheese (cream cheese would work too, the cheese it optional)
8 ounces of mixed blueberries, raspberries, cherries and blackberries, fresh or frozen

1 cup of heavy cream
1/4 cup of maple syrup

Beat together eggs, milk, vanilla, cinnamon and maple syrup.

In a casserole or souffle dish, mix together the bread, the berries and evenly place quarter sized dollops of the mascarpone. Pour the egg mixture over it.

Cover it and stick it in the fridge overnight.

Preheat your oven to 350. Put he strata (covered) and cook for 35 minutes. Take off the cover and cook for another 15 minutes.

During the last 15 minutes of cooking whip the heavy cream with maple syrup into a whipped cream.

Let the strata cook for a bit, then serve with whipped cream and more maple syrup if you like.

Monday, March 10, 2008

How to make grilled pizza - the definitive answer.


By Cookbad

I have perfected the grilled pizza technique, and I'm now convinced that unless you have an oven that will go up to 600 degrees, this is the way to do it. The high and dry heat of the grill is the perfect pizza environment.

So here is how I do it:
I cheat and buy my pizza dough at trader joe's, because I'm lazy and it's good dough. In my previous lazy East Coast days I would stop buy whatever pizza shop I was walking by and buy some dough off of them.

Fire up the grill to high and close the cover.

2 doughs looking at the ocean

Get out a rack big enough to put your pizza on.

Slather a some olive oil on your dough and hands then press it out onto a pan, as thinly and evenly as possible. Don't leave the edges that will be the crust thicker. If you end up with a minor hole or two than can't be repaired, it isn't a tragedy.

Go check and see if your grill is really really hot. 500 degrees where you want it. 400 at the lowest.

When the grill is hot, grab a metal spatula and some tongs.

Take the pan that has the dough stretched over it and hold it dough side down. The dough might start to fall to the grill on it's own, or it may need some gentle help with the spatula. This is the hardest part of the whole project and it took me a few times to get it down. If might fall unevenly and if it does, you can either try to reshape with the tongs (don't rip it) or just leave it.
the dough just before shutting the grill

Remove the pan, shut the grill. Count to 30, slowly.

the dough after 30 seconds

Open the grill. If the dough has huge bubbles and it looks like it is browning well, flip it. If you try to flip it and it rips, close the grill and count to 20. If it is lifting well but sticks to the grill, gently take the spatula to the sticking parts.

Once it is flipped, close the grill and count to 30.

It should be done. Take it off the grill and put it right onto the rack-- the most recently cooked side up.

Let the crust cool a bit and turn down your grill to 400.

to chiffonade basil, lie 5 or 6 leaves on top of one another

Then roll it into a cigar shape and thinnly slice.
Toppings:
If you are using sauce, be conservative but sauce all the way to the edges.

Any vegetables should be sauteed, grilled, cooked down so they don't swamp and dampen the dough. Cheese is easy, what you please with it. Same with meats.

Take the rack and pizza, open the grill and using the tongs, grab as far into the center of the pizza and pull it in one swift motion onto the grill.

Close the grill. After 5 minutes, check it. If you have nicely melted and slightly browning cheese, take it off. If not, leave it another 2-3 minutes.

Most likely the bottom will be charred in a few spots when it's done. But is it still completely edible and delicious.

Monday, March 03, 2008

Cilantro, Pistachio, Ancho Chile Rubbed Chicken with Stinking Rose Polenta

By Cookbad

I'm throwing my hat in the ring for this round of The Paper Chef Challenge!

I was very pleased with the outcome of this dish. The final honey glaze is really nice. You could thicken it with pistachio flour or add crushed pistachio for color.

You can make this in under 45 minutes. Halves really well. I am really happy with it

STILL, it greatly pains me to only have terrible photos of this wonderful dish. My camera has gone missing and I had to take these with my laptop. No amount of adjusting in photoshop could improve them.

Cilantro, Pistachio, Ancho Chile Rubbed Chicken with Stinking Rose Polenta
Serves 4

For the chicken lotion:
1 cup roasted salted pistachios
2 cups cilantro leaves
2 tablespoons lime juice
1 garlic clove, chopped
1/3 cup olive oil

For the Chicken dry rub:
2 tablespoons ancho chile powder
1.5 tablespoons cumin seeds
1.5 tablespoons corriander seeds

4 organic chicken breast halves with skin and ribs attached

2 tablespoons olive oil

1/2 cup honey

For the Polenta:
1/2 clove of garlic rubbed with olive oil

6 cups of low salt chicken stock
1.5 cups course corn meal

Cilantro leaves for garnish
lime slices (optional)
ancho chile powder
salt to taste

Preheat oven to 400 f.

Throw the oil rubbed garlic in the oven and roast for 20 minutes.

Put the first 5 ingredents in a food processor and pulse into a paste or chicken lotion.

Toast cumin and corriander in a pan over med-high heat until fragrant (about 90 seconds)
Crush up and add ancho chile powder.

Rinse, pat dry and salt chicken. Stuff lotion under the skin of the chicken then massage both sides with the dry rub mixture.

Heat a cast iron pan over med high heat. Add some olive oil then brown both sides of chicken.

Put in the oven and cook for 20 minutes.

At this point you want to start the polenta.
Add 1.5 cups of stock to 1.5 cups of corn meal. Stir stir stir until the mixture boils. Reduce to a simmer and stir often. When garlic is roasted, squeeze each clove into the polenta. Keep stirring. It should be finished in about 25-30 minutes.

After the chicken has been cooking for 20 minutes remove from oven and rub the rest of the lotion over the chicken.

Cook for 5 more minutes. Remove from oven.

Remove chicken from pan. Scrape bits of the bottom of the pan, add honey and whisky until smoothish.

When serving, put a pinch of ancho chile pepper on the polenta and serve with a couple of lime slices if you so desire.

UPDATE!! I won!
So, I'll be hosting next months challenge!

Sunday, March 02, 2008

Tepache

Homemade hooch. About 5% alcohol.

By Cookbad

Tepache is a slightly boozy drink made from mashed up pineapple, skin and all that is left to ferment for 5 days and according to Wikipedia, Tepache is commonly made by inmates in Mexican prison.

This is my first foray into Mexican Prison cuisine, so I'm excited.

This is how I made mine, which is based on Diana Kennedy's version:

Tepache 1 very ripe pineapple (about a 2 pounder) a handful of cinnamon bark, crushed up about 2 inches of ginger, sliced to coins then slightly crushed 10 cups of cold water 1 cup sucanat or brown sugar 1 can of light beer Chop up and then crush up the pineapple into a container large enough to hold all the ingredients. Cover with 8 cups of water. Add cinnamon and ginger. Cover and set in a warm place for 3 days. On the 3rd or 4th day put 1.5 cups of water and the sugar into a saucepan and bring to a simmer until sugar is melted. Let this cool off then add to the fermented pineapple along with the beer. Stir, cover and leave for another day or 2. Strain, strain again and then finally, stain thru cheese cloth. Serve very cold.


You could make it just with the rinds of the pineapple. A nice thing to know if you hate to waste any part of whatever you are preparing.

With all my booze projects I like to take a picture of the lucky person who first gets to taste whatever I have left to ferment. This time the picture as pretty tame, as the tepache was, surprisingly not bad at all.

"It tastes like I'm drinking something I shouldn't" was his first reaction, but he went of to finish the mug.

I have to admit that we tried it only after the beer ran out, and we were slightly past the point of being able to go get more, so we were really wanting to like it.

We didn't drink that much of it, so I cannot report on hangover severity.

UPDATE: I drank all of it over a 4 hour period of time. Adding fresh lime juice made it taste really good. Adding rum to it makes it taste good and will get you drunk. Very mild if any hangover.

Wednesday, February 27, 2008

Turmeric Ice Cream or Semifreddo

Turmeric Ice Cream is florecent yellow and will stain anything in comes into contact with

By Cookbad

Happy belated Tết, everyone!

I've been planning on going to Little Saigon in Westminster, Ca for a year now. I unknowingly chose the day before Vietnamese New Year. I figured this out upon my arrival. It was like trying to navigate Fairway the day before Thanksgiving. The only difference is it was much more fun and much less a contact sport.

My sister was in town visiting and we did our favorite thing to do (besides drink and yell at the television) & went grocery shopping.

I skipped the buckets of pig blood (someday. . . .) but got some lovely things, one of which was a nicely decorated single serving hand coffee grinder--double as a spice grinder. Perfect for camping.
Tiny Vietnamese hand coffee grinder. Coffee goes in the top, comes out in the cute little drawer.

We also got some fresh Turmeric that my sister thought it would be fin to make ice cream. Dried Turmeric is the stuff that turns curry yellow. Fresh turmeric has a rooty, slightly ginger carrot flavor and will stain the hell out of anything that is comes in contact with.

Raw tumeric root.

It also recently occured to me that Semifreddo is the best thing to make if you don't have an ice cream maker. It is very simple, beautiful to serve and sounds fancy.

Here is how to make them both:

Turmeric Ice Cream:
Serves 6

1. Get together 5 or 6 oz. of fresh Turmeric root.
2. Change into all black clothing.
3. Peel Turmeric.
4. Place into a small food processor or blender with 1/2 c. of milk and puree.
5. Pour 2 cups of milk, 3/4 cups of sugar (more or less depending on how sweet you like your ice cream) and 2 scrambled eggs into a sauce pan.
6. Heat and stir over med. low. Do not allow the mixture to boil or you'll end up with milk sweet scambled eggs. Just stir more or less constantly for 10 minutes.
7. Put in the fridge or freezer to chill
8. Whip 2 cups of cream to peaks.
9. Once everything is cold, put it all into an ice cream maker for 20 minutes.

You can toss in some shelled pistachios. They add a nice texture and the green is ridiculously dramatic against the florecent yellow.

Turmeric Semifreddo:
Serves 6

1. Separate 3 eggs.
2. Beat the egg yolks with 1/2 c. of caster sugar until they turn pale yellow.
3. Beat the egg whites until they come to stiff peaks.
4. Whip 1.5 cups of heavy cream to peaks.
5. Put on all black clothing
6. Peel 5-6 oz. of fresh Turmeric root.
7. Puree with 1/2 cup of milk in a food processor or blender.
8. Line a loaf pan or any type of mold you would like with plastic wrap.
9. Gently add the Turmeric to the egg yolk mixture.
10. Gently fold the egg yolks into the whipped cream and egg whites.
11. When combined, pour into mold, cover with plastic wrap and freeze overnight.

Monday, November 26, 2007

Apple crumble


There are a million recipes for crumble, but I just wanted to find a simple combination that worked. Here’s what I came up with, as my crumble. Amounts can be changed to suit however many people.

Peel the apples, and slice or cut into chunks. I did both for some variety of texture. Mix them with sugar, cinnamon, clove and nutmeg, and pour them into a buttered oven dish.

For the topping, equal weights of butter, flour, and brown sugar, plus a couple of handfuls of oats.

Rub the butter into the flour like you’re making a pie crust. Mix in the sugar, and the oats, and pour it all over the top of the apples. Bake at 190c for 30-40 min.

The apples cook and form a nice syrupy sauce that gets all bubbly as you cook it, and the crumble comes out perfectly lovely and crumbly.

So easy to do, and totally satisfying.

Saturday, November 10, 2007

Ham And Brie Pie with a walnut and honey crust


So I invented a pie the other day and it came out really amazingly well. I was extra pleased with it. I got the idea from the movie “Waitress”, one of her pies was a brie and ham pie, but that was about all I could remember about it, so I decided to get creative.

I don’t have the exact measurements for some of the ingredients because I was just making it up, but I made a walnut and honey pie crust. I used 150g flour, 75g of butter and a few handfuls of walnuts, chopped super small in the food processor, but not totally to powder. And a few squeezes of honey. Oh, and an egg yolk. Mixed together in the usual fashion, butter rubbed into flour, then walnuts and honey mixed in, and the egg yolk and a Tbsp or so of water to bring it all together. Roll out into the pie shell and leave in the fridge to chill for about an hour. Some people say to rest the dough in the fridge in a ball and then roll it out, but others say to roll it out first, then rest it. I prefer the latter, because it’s just a bit easier to roll that way, besides, I like how the perfect pie case looks coming out of the fridge.
I also blind baked the shell, but I’m not entirely sure that was necessary.

For the filling I lined the bottom with slices of brie, and then sprinkled over a layer of diced cooked ham, and then mixed up 5 eggs with some cream and 2 tsp of Dijon mustard, seasoned with some salt and pepper, and poured it over the ham and cheese. Baked at 180 for about 40 min. I would start checking at 30, but be prepared to go to 45 or 50.

It was really tasty. It had a honey mustard feel to it that went well with the ham and the brie, and the walnuts really tied it all together. The boys liked it too, it was clean plates all around.

It was also really good cold the next day for lunch. I would make this again. I bet it would be great in the summer as a cold picnic pie.

Tuesday, September 11, 2007

Scallion pancake fry up


I got this idea from Matzo Brie, where you break up the extra matzo and mix it with eggs (this is obviously an oversimplification). I figured why not do it with the extra spring onion pancake the next morning.


Cut the pancake up into bite sized pieces. In a separate bowl mix about 5 eggs with a little milk, salt and pepper. Add some fresh chopped parsley (to combat the onion-y-ness of the pancake, it is breakfast time after all). Then add the pancake pieces into the bowl and stir to coat it all completely.

Heat up a pan (non stick) and melt some butter in it. Add your egg mix and leave it alone till it starts to set, then mix it around in the pan like you were making scrambled eggs till it’s done.


This was really satisfying. The parsley did a good job balancing out the onions, and the thick chewy pieces of pancake made it really filling and comforting. Whenever I make scallion pancakes in the future, I will always set aside a little to make this for breakfast the next day. I loved it!

Monday, August 20, 2007

A new tea drink


This was just a quick something. I think it would be nice on a winter night.

Quick note, you can really only make this in the uk…

I steeped a cup of decaf tea, then added…
Ginger drink (like a non-alcoholic ginger wine) about 1/2 to 1 shot
Lemon juice, about 1/2 shot
Cinnamon, a sprinkle
And to pull it all together, a splash of peach flavored Robinsons.

This had a nice flavor, and a bit of a bite. The actual amounts can be adjusted to taste.

Monday, July 09, 2007

Summer Dinner Pie


I called this a Summer Dinner Pie, but it was really just a summer version of leftover pie. Here’s what I had:
2 or 3 cups of brown rice (cooked)
2 eggs
a few celery sticks
a couple of scallions
4 tomatoes
Fresh parsley
A couple of handfuls frozen peas
About 1.5 or 2 cups diced ham
About a cup of cheese (I used cheddar)

To make this I used a spring form cake tin so it would be nice and big, and I used the basic pie pastry recipe here.

When you are done making the pastry, break it in two like it says, then put both pieces into the fridge for about 20 min.

While it’s resting, mix the rice with one of the eggs and the scallions and celery (or whatever other vegetables you have lying around at the bottom of your fridge about to go bad. I almost put a green pepper in, but decided I had enough stuff). Mixing the egg in helps it to hold it’s shape really nicely once it’s baked, and it also gives the rice a little extra moisture so it doesn’t dry out.

Chop the tomatoes and the parsley and mix together.

Grease the cake tin. I like to put baking paper on the bottom of mine too, it just makes everything so much easier. They sell special circle shaped sheets of baking paper, and if you have too much money and don’t know what to do with, you could get stuff like that, but I find that value baking paper and a pair of scissors works just fine.

Roll out the larger piece of dough, and line the cake tin with it, letting the excess hang over the edges.

Pour in the rice mixture and gently make it flat-ish. Add the tomato/parsley layer, then sprinkle over the peas, then the ham, then the cheese.

Roll out the smaller piece of dough and cover the pie with it. Pinch the edges together to seal them. Poke some holes in the top with a fork, then beat the last egg to brush the top. Bake at 200c for 10 min, then reduce to 180c for 45 min.

This looks kind of complicated, but it’s really just something that you can modify to fit whatever you have left in the fridge at the end of the week. I recommend that you keep a rice layer, it holds the shape nicely, and it will help soak up any extra moisture from the wetter ingredients, like tomatoes. A green veg in there is nice too, it makes it a balanced meal in itself. I was thinking broccoli at first, but I had waited to long, and it had gone off completely.

All in all this achieved what I wanted it to. I wanted to know if I could make a dinner pie that was summer-y. Something that would work for an indoor meal or a picnic, and mostly, I wanted to use up a bunch of stuff. This ticked all the boxes.

Here’s a list of some other things that would have been good:
Any leftover meat, diced
Broccoli
Green pepper
Chopped hard boiled eggs
Potato
Anything really.

Sunday, June 17, 2007

Last Minute Baked Apples


Right when I was about to make dinner, I decided that I was going to want dessert. I didn’t really have the time or inclination to make a big deal out of it, so I made these up…

Peel and core 4 apples and place in a dish that just holds them.
In a bowl mix together some chopped nuts and some chopped crystallized ginger. I decided after the fact that some raisins would have been really good here too. Add a good shake of ground cinnamon, and then enough honey to make it all come together like a sticky stuffing.
Fill the holes in the apples (where the core used to be) with the stuffing, and drizzle some more honey over the top of the apples. Pour in some red wine to come about halfway up the apples, and throw on a couple of dots of butter.
Cover and bake for about an hour at 180c/350f, but uncover for the last 10 - 15 minutes.

Not terribly original I know, but it was really good, and very satisfying. My husband mentioned that it would make a really nice Christmas dish. It definitely had that winter comfort feeling to it. The wine and honey make a beautiful sauce.

They were really quick to make too. I’d say it was about 5 minutes of prep (the nuts were already chopped), then they just cooked while we had dinner.

The boys weren’t terribly interested in theirs, which was ok, because my husband and I decided that since I used such small apples, two was just the right amount for each of us.

Next time, I will use larger apples, and put raisins in the stuffing.

Tuesday, June 05, 2007

Breakfast Sandwich a la Henry


This is a bit of a cheat, because I didn't actually make it. My Dad and Stepmom are out here visiting and he made this for breakfast today. First you make french toast, then you make a grilled cheese sandwich, using the French toast as the bread, Then cut it up and sprinkle over a little salt... so good!

Not exactly health food, but it's got all the same ingrediants as a cheese omlette and toast, so how bad could it be for you?

I think this would also be good with some ham in it.